Updated 5/30/24
A great physical science education tool isn’t just exciting while you’re using it; it continues to provoke thought and make real-world connections well after you’ve placed it back on the shelf. Case in point: I recently spent time exploring Pitsco’s T-Bot® Hydraulic Arm. It was a fun challenge using the hydraulic robot arm to pick up and move blocks, and I thought about links to automation and heavy machinery as I used it. But, to my surprise, after I put the device away, what I really couldn’t stop thinking about was my own arm.
Pop quiz: What do a claw hammer, a wheelbarrow, and a broom all have in common? We can skip the suspenseful drum roll here because the title kind of gives it away, but each of these tools is a simple machine called a lever.
After you learn to identify levers, you’ll begin to see that they’re everywhere, all around you. Doors are levers. Fishing rods are levers. Tweezers are levers. And, yes, even your own arm is a lever.
Levers, like the other five simple machines, are arrangements that produce mechanical advantage. That’s to say, in one way or another, they make work easier by multiplying or changing a force applied to it. As we shall see, however, this always, always, always comes at a cost. You can’t get something for nothing.
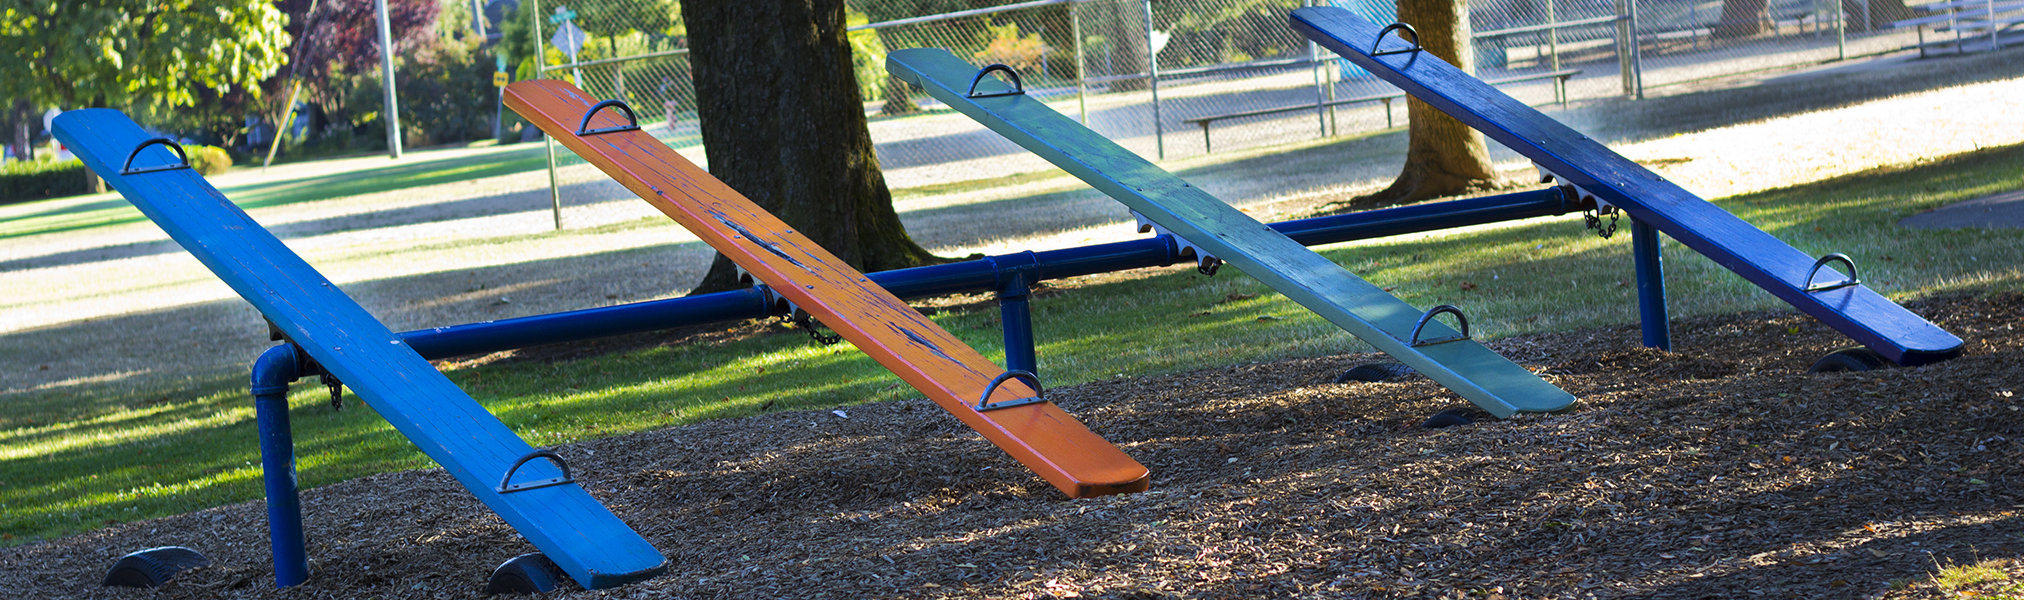
The most recognizable type of lever is a seesaw. The fulcrum is in the middle. Effort is applied on one side of the fulcrum, which moves a load on the other side of the fulcrum.
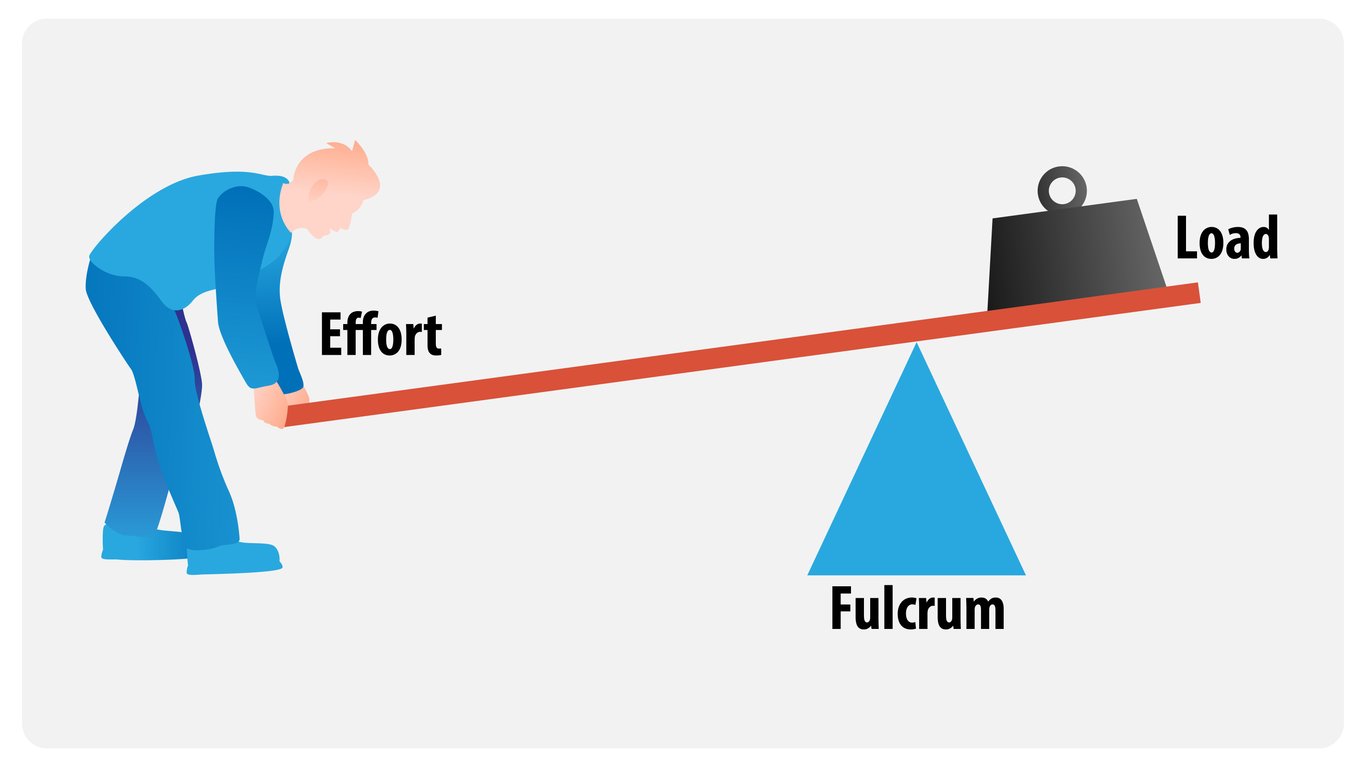 To understand the mechanical advantage, let’s take away the seesaw for a moment. Imagine a heavy weight sitting on the ground. By straining, you can lift it straight upward a distance of one foot. Now imagine the same heavy weight on one side of a seesaw, relatively near the fulcrum. By pushing down on the lever at a spot on the opposite side of the fulcrum, you can lift the weight. The farther away you can move from the fulcrum, the more mechanical advantage you’ll have. Which is to say, the less you’ll have to strain.
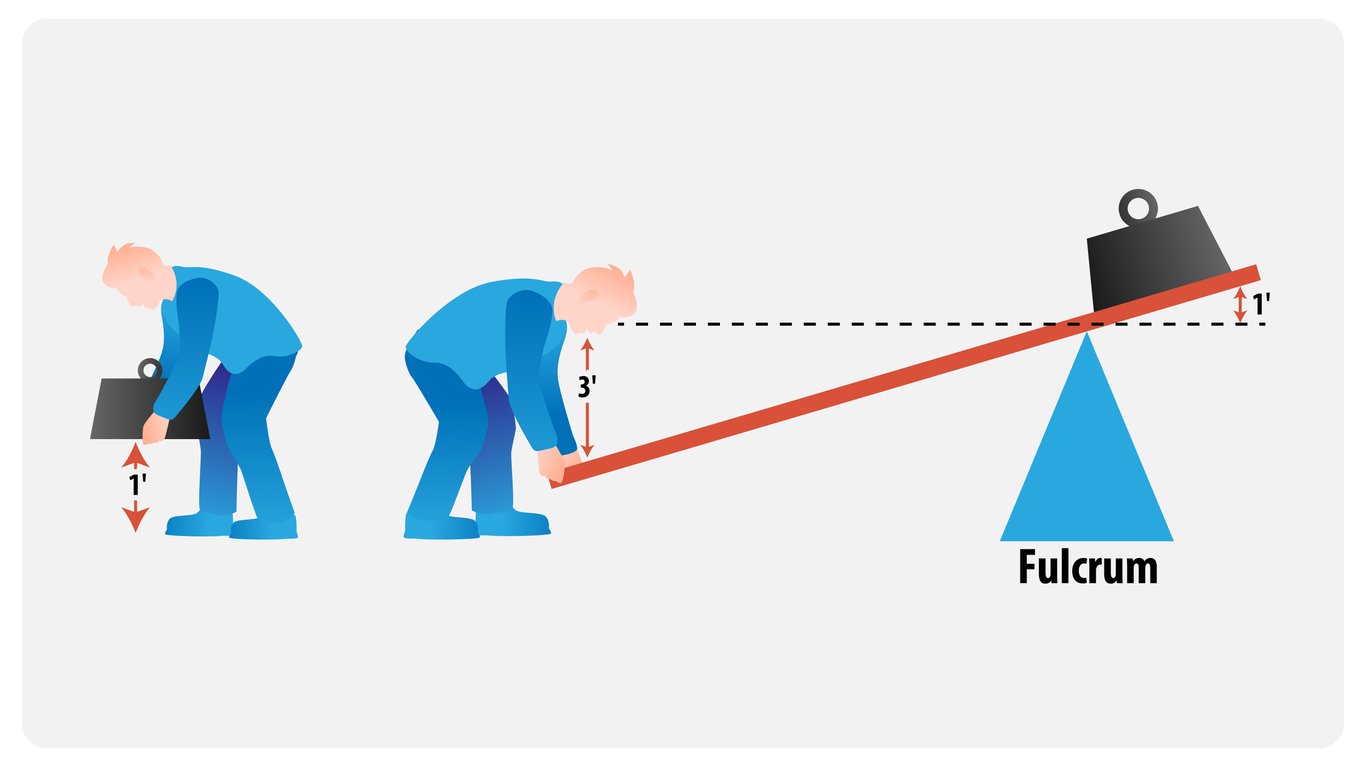 But there’s a tradeoff for your laziness – er, ingenuity. To lift the weight a foot into the air again, you’re applying effort over a greater distance. For example, if the effort is applied three times farther away from the fulcrum than the weight is situated, you’ll have to apply effort three feet to move the load one foot.
By the way, a seesaw is a Class 1 lever. The fulcrum is between the effort and the load. A claw hammer is also acting as a Class 1 lever when pulling out a nail. The nail is the load, the point where the hammer rocks is the fulcrum, and the effort is applied downward in the direction of the hammer’s face.
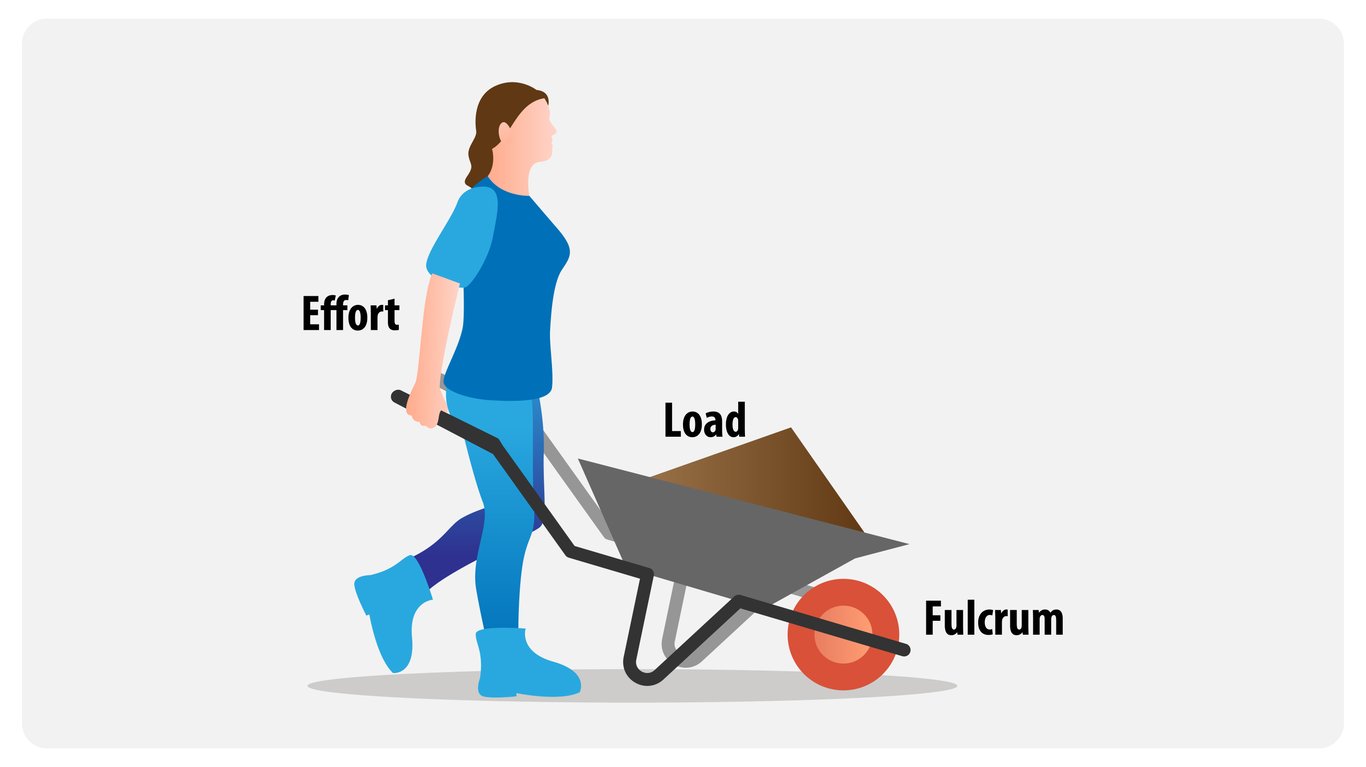
In a Class 2 lever, the fulcrum is at the far end, and the load is situated between it and the effort. Because the load will always be closer to the fulcrum than the effort, this will once again provide a mechanical advantage. The classic example of a Class 2 lever is a wheelbarrow.
 A Class 3 lever is the only arrangement left: again the load and the effort are on the same side of the fulcrum, but this time the effort is applied closer to the fulcrum than the load. Does this arrangement provide a mechanical advantage as well? Actually, no!
It creates a mechanical disadvantage. However, the tradeoff can still be useful. The payoff for the additional force required is that the load (rather than the effort) moves a greater distance. A broom is a Class 3 lever.
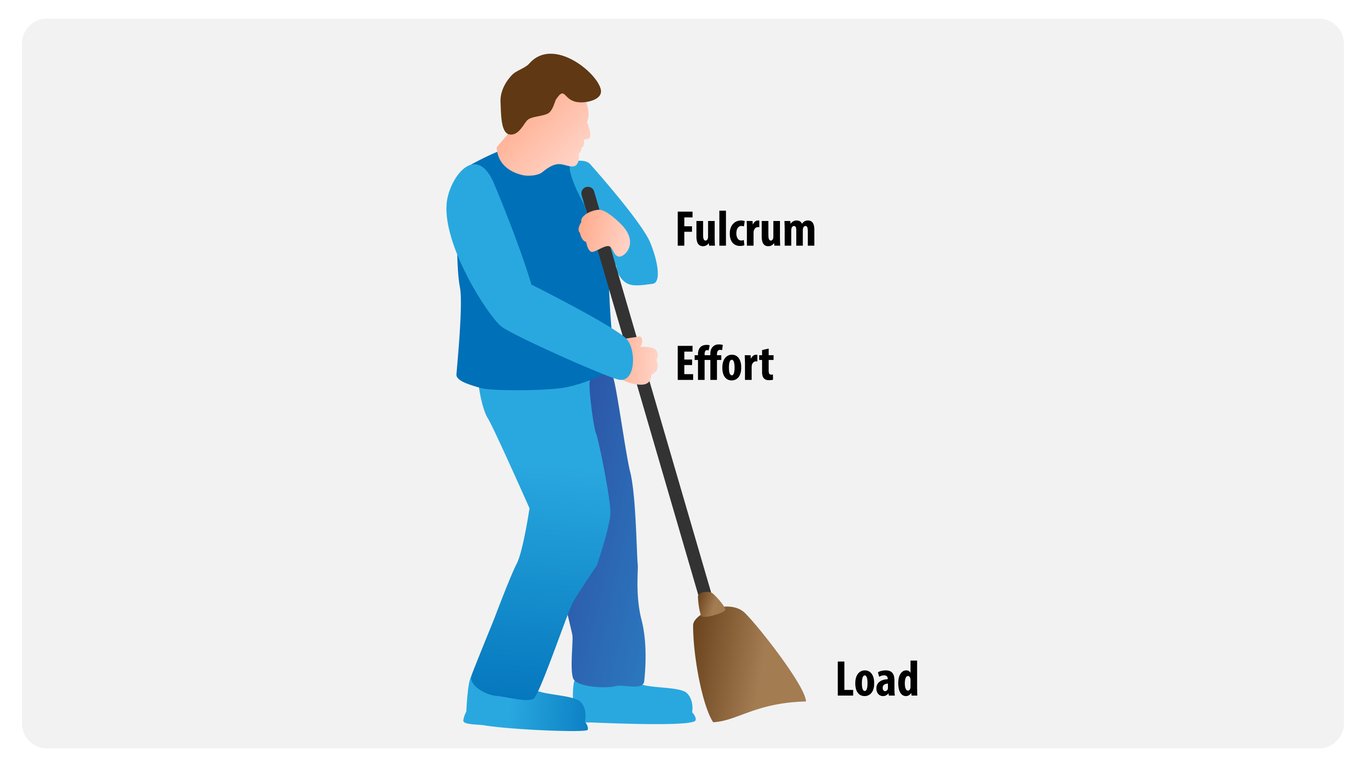 Applying effort between the fulcrum (where the top hand grips the handle) and the load (the broom head) causes the broom head to sweep a farther distance. This is what lets you move more dust with fewer sweeps.
Now we have the information we need to jump into our T-Bot challenge.
The T-Bot Challenge
Identify every lever on the T-Bot. For each, determine where exactly the fulcrum is located, where the effort is being applied, and where the load is to be found. With this information, categorize the levers you find as one of the three types.
You’ll need to operate the T-Bot to see where each plunger applies its force and where it causes the bot to pivot. This activity makes for a great discussion because multiple people may develop alternate theories.
The answers are below, but don’t peek until you’ve tried it out and formulated your own ideas.
Answers
There are three relatively straightforward levers on the T-Bot and one additional lever, which we will discuss last.
Lever A
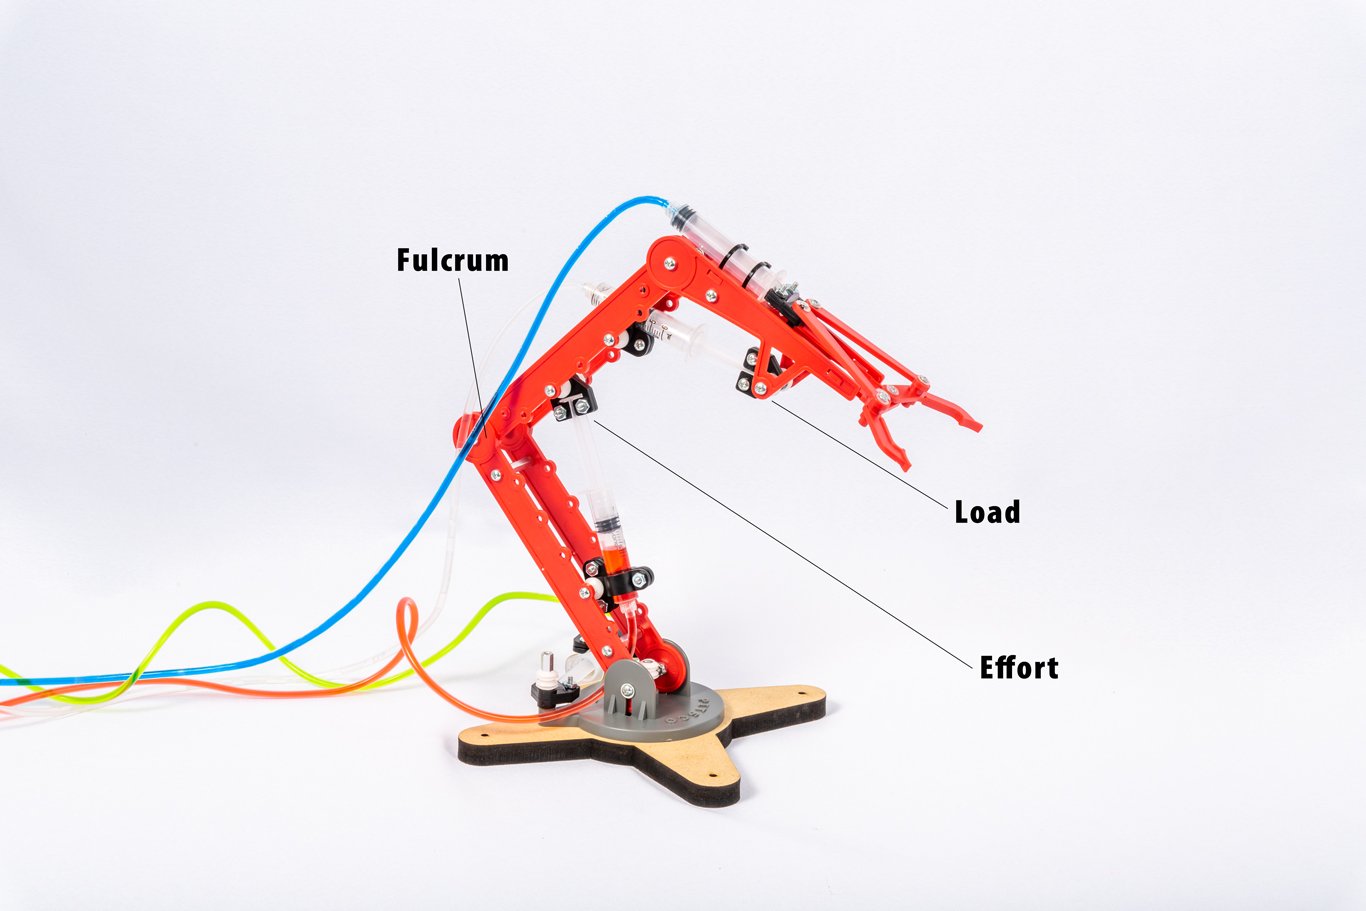 Lever A is a Class 3 lever. The effort is applied between the fulcrum and the load. This means you lose out on mechanical advantage but you gain in distance traveled.
Lever B
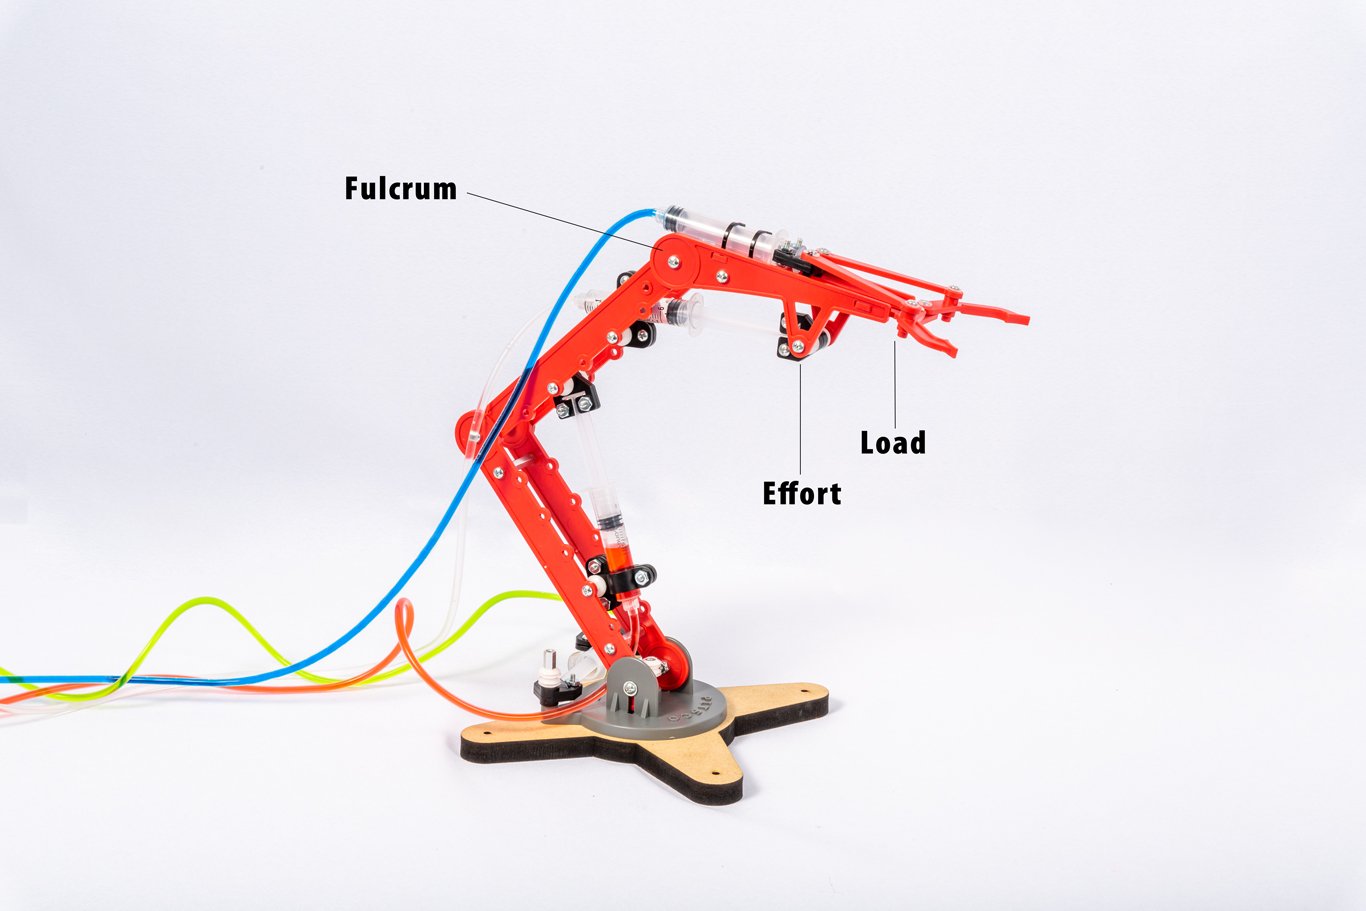 This is also a Class 3 lever. This might feel a little more ambiguous because when the arm is extended straight out, the far point of the syringe is located behind the fulcrum relative to the load. But don’t be fooled. Look at where the upward force is actually being applied. Because the syringe itself is allowed to rotate, the effort force is transferred by the plunger up through the triangular connector pieces into the last section of arm – between the fulcrum and the load-bearing gripper.
Lever C
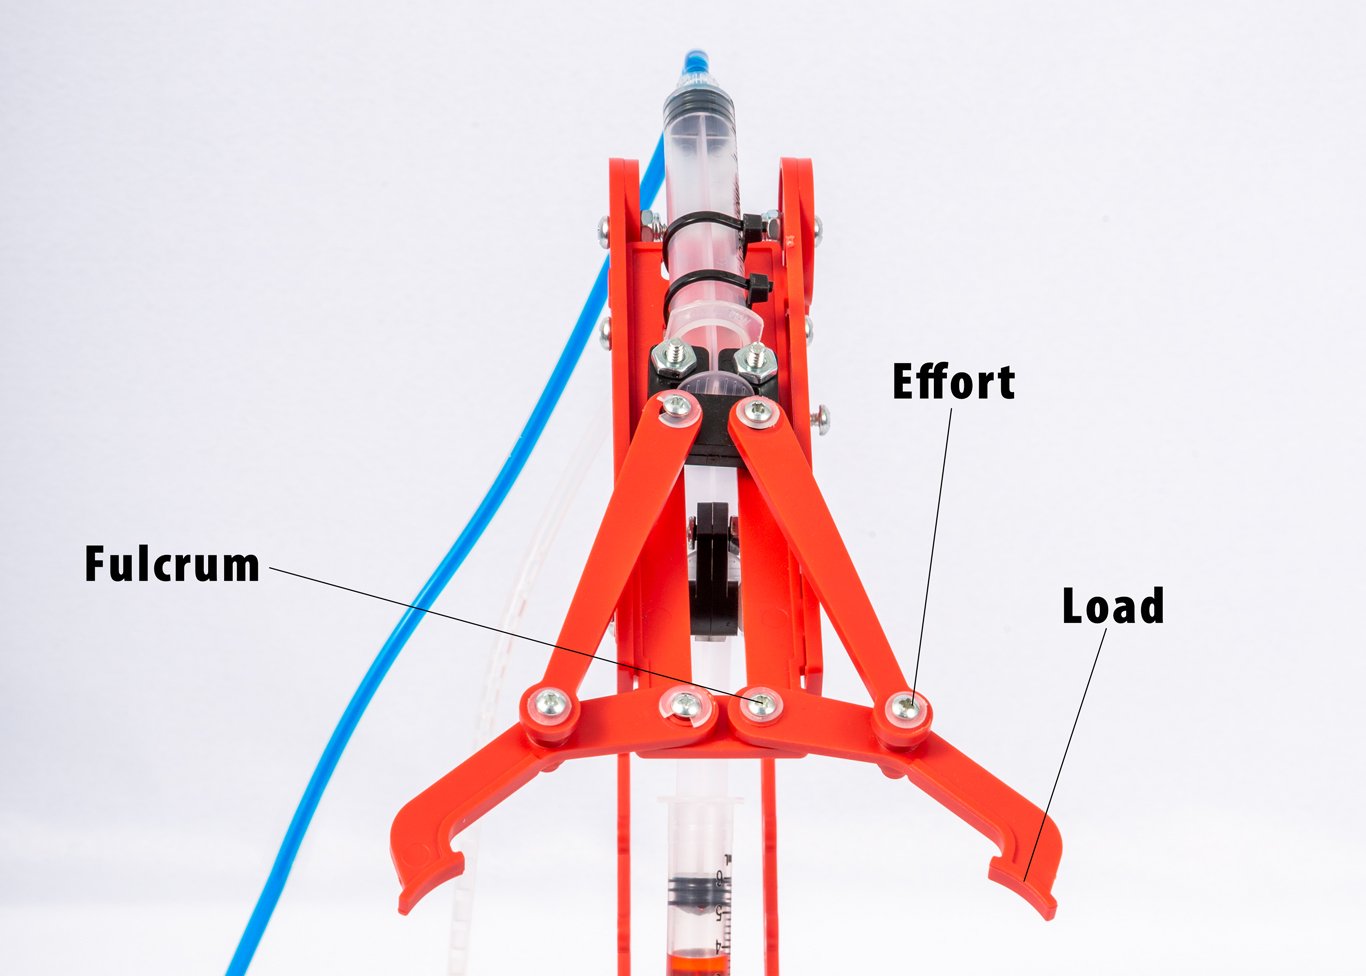 This one is trickier still, but it’s also a Class 3 lever. There are a couple locations you might construe as the fulcrum, but the fulcrum is where the gripper itself pivots from. The effort transfers down from the syringe through the connecting piece, which applies its force between the fulcrum and the end of the gripper, which is the load in this case.
OK, nitpickers, we’ve labeled this as one lever, but it’s really two parallel and identical levers operating off of the same input force. Two levers for the price of one! Yay!
You’ll notice that we have accounted for three of the T-Bot’s four operating plungers. Here’s where it gets a little tricky.
Lever D
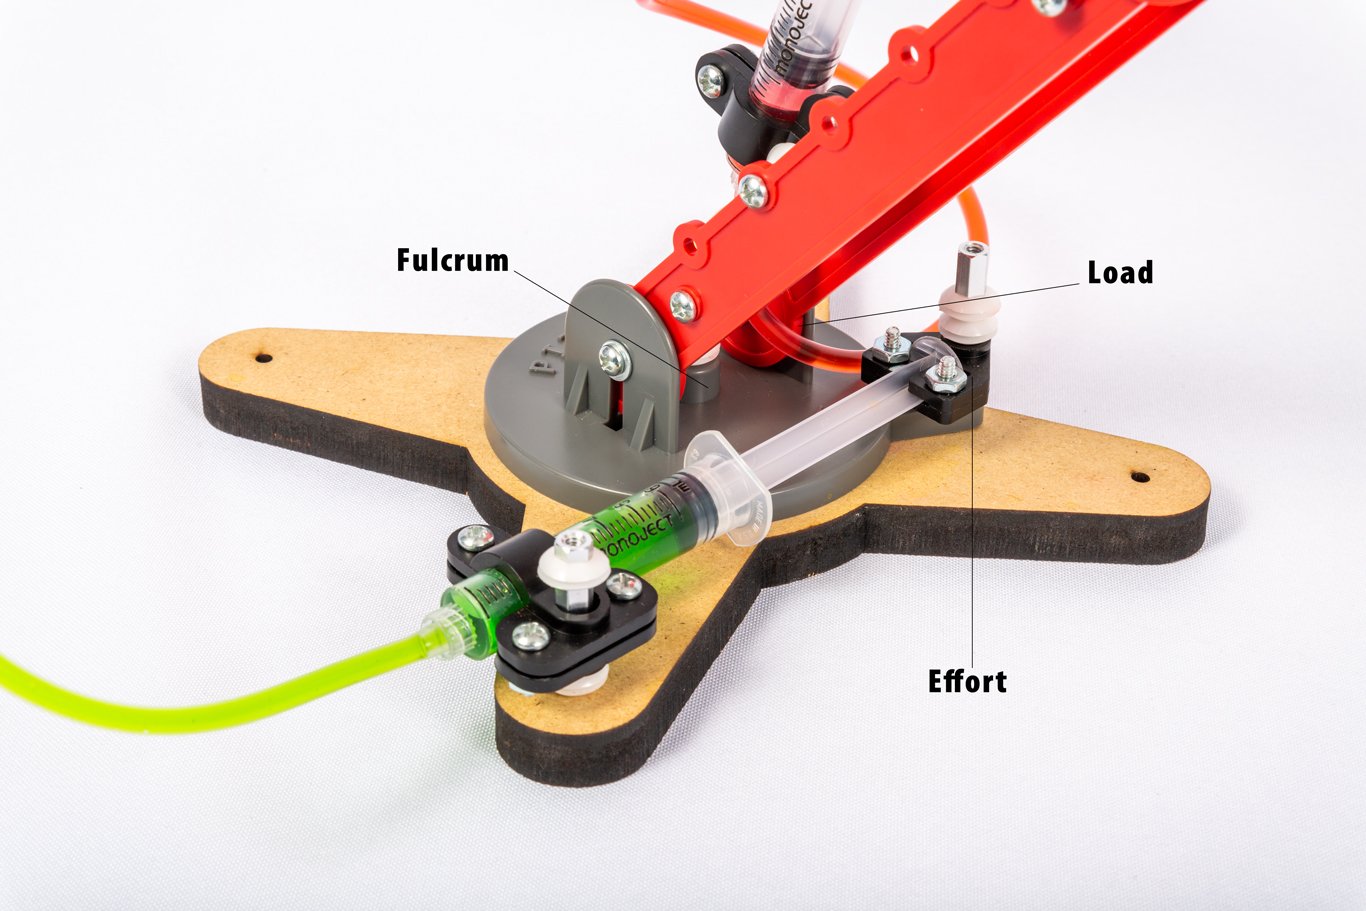 Our final lever is actually another type of simple machine called a wheel and axle. However, those in the know realize that a wheel and axle is actually a modified type of lever. The fulcrum is identical to the axle – the point at which the whole robot rotates around. The effort is applied at the outside of the rotating wheel. The load is a little tricky, but if you think about where the input force is really being transferred to, you’ll see that it’s found where the robot connects to the wheel on the same side of the fulcrum as the effort.
In other words, what we have is a Class 2 lever!
If you’ve made it all the way through this activity, I can almost guarantee that you’ll start seeing levers all around you – and as a part of you. Along those lines, here’s a good bonus question relating to what the T-Bot got me thinking about: what class of lever is your arm? Leave your theory and your reason in the comments!
MORE RESOURCES:
TOPICS: IN THE CLASSROOM, Middle School, Elementary School, High School, ROBOTICS, Teacher Resources, Science, Technology, STEM, Authentic Learning, Activities, Hands-on Learning